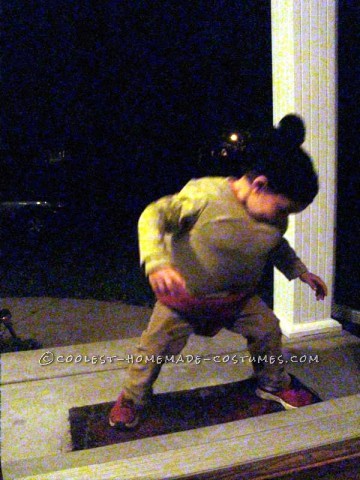
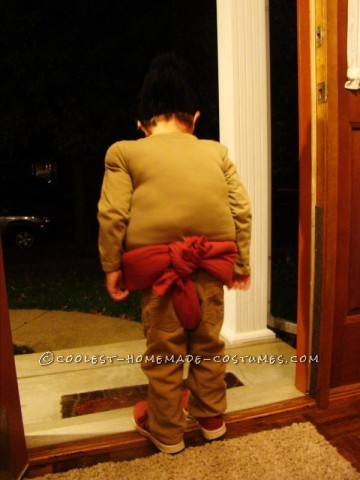
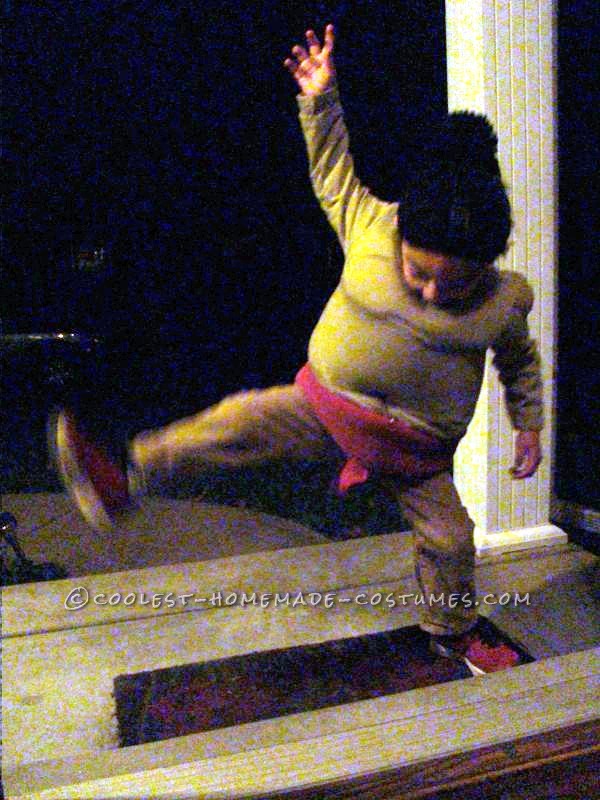
Our little man is a rough and tumble kind of kid. After watching him try and push around his older sister during horseplay we thought that a Sumo Wrestler costume would be totally appropriate for him! Putting the costume together was the easy part. Getting it off him was the hard part! He loved running and bumping his belly off of people, plants, animals, furniture…you name it! He even asked to wear it the next morning.
Materials and How To:
Hair:
- Black Yarn
- 1 black elastic circular headband
- 1 black elastic hair tie
Cut long strands of yarn, fold them in half and one by one loop them over the elastic band pulling the ends through the loop to attach the strands of hair to the band. ( it sounds like it would take forever but I finished it while catching up on one of my programs, not too bad.) Place the head band around your child’s head and form a ponytail, looping the “hair” in a bun. Cut off the excess and you have yourself a sumo style wig. I made the wig about a week in advance. Once the bun was secured it was easy to take on and off without having to adjust anything.
Sumo Body:
- 2 tan colored long sleeve shirts 1 size larger than your child would normally wear.
- 1 Sheet of Foam
- A small amount of fabric glue
- Needle and Thread or safety pins
- Package of stuffing
- Khaki Pants
Cut 2 small and 1 large “D” shapes out of the foam to create the “Pecs” and belly shapes of your costume. Turn one of the shirts inside out and use fabric glue to secure them to the inside of the shirt. Be careful not to use too much glue as you might end up attaching the two sides of the shirt together (like I did. I just pulled it apart but it did leave a mark on the shirt).
Once it was dry I turned the shirt right side out again and placed the shirt without the foam inside the foamed shirt. Then I sewed (or you could use safety pins) the ends of the shirts together creating a pocket for your stuffing. I concentrated on the belly and gradually used less stuffing as I got closer to the collar and arms. Once your stuffing is in, work it around to form the belly shape you like. Next, sew a few stitches securing the two shirt collars together. I added a belly button by simply pulling a needle and thread through the belly several times in an asterisk shape.
Sumo Belt:
- 2 Sheets of Foam
- 1 old adult sized T-shirt
- Duct Tape
- Safety Pins
Cut the T-shirt across the top just under the armpits and then up one side seam creating a large piece of fabric to wrap your foam sheets. I folded the foam sheets in half and secured them with duct tape (my foam sheets weren’t long enough to make it around my son’s belly so I simply placed two folded sheets side by side). Then I wrapped the foam with the T-shirt material and secured that material with duct tape. The duct tape won’t be showing as it will be on the inside of the belt. Leave excess material on the ends to make the knot on the back of your sumo. Cut the left over material from the arms into a long strip to form the “thong” of the sumo. (sorry, didn’t really know how else to phrase that) I attached the belt and “thong” using safety pins to the belly.
Overall, this costume was a huge hit and definitely one that we will remember in years to come. I think people appreciated how much our son enjoyed his costume and the fact that it was unlike any other child they had seen. Added bonus for this costume is that your child will be warm for those chilly autumn nights and well padded if they take a few spills while running from house to house during trick or treating.








Your comment has been sent successfully.