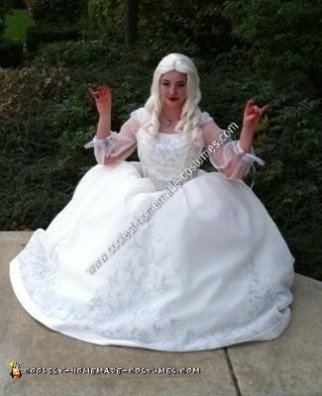
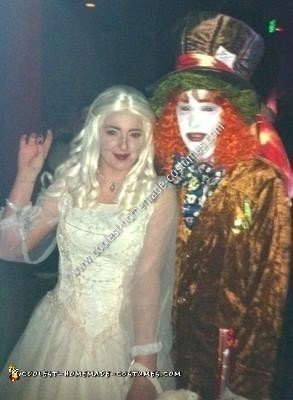
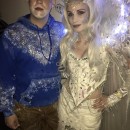
After seeing Tim Burton’s Alice in Wonderland this year, I was determined to make the White Queen costume, played by Anne Hathaway.
I always make my costumes, and swear against using any “off-the-store-shelf” costumes. This White Queen costume was definitely the hardest I have ever made, and took over 50 hours of work.
Difficulty: Moderate
Time to Make: 20-50 hours
Time to get ready (day of): 1 hour
Materials for the White Queen Costume
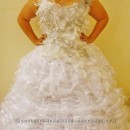
-A ballgown wedding dress: I started with the base of a used wedding dress. It really is the only way to go unless you are insanely good at sewing and can make one, I would find something to start with. You will need a ballgown style dress with a fitted top. Although the dress in the movie looks white, in pictures it seems more off-white/ivory, so I got an ivory dress with silver threading.
-Fabric to modify the White Queen costume dress: I had to take the sleeve off of the dress and add the organza flowing sleeves instead. It took me 4 yards of organza (more because I played trial and error with 2 yards tho)
-4-5 yards patterned lace: you can buy it by the yard I found a good match at JoAnns
-4-5 packages beads: A small pearl, large pearls, standard metal cylinder beads, I used a silver metal beads for the pearls, with small clear beads as spacers
– Needles and strong thread
-A sewing machine will make it easier, but depending on how many modifications you are making, it may be possible without one. I only used the machine when I re-did the sleeves, so if you are not doing that part, the beads and lace, I did by hand.
-Optional Under Skirt/Slip/Crinoline: I got another poofy slip to go underneath the dress and add fullness. They are 50-80 dollars new, but if you look at local classifieds for ones included with wedding dresses, some people may be willing to sell you just that piece. That is what I did and got my crinoline for $25.
-A white blonde wig: Like I said, I stay away from standard costume stores. Costume wigs also never seem realistic and get tangled and look cheap. I got this wig at The Accessory Store, (I’ve seen them in a lot of malls) and it is called White Goddess, and was $40. If you are looking elsewhere, you need to be careful finding one that is not too blonde, but also not all the way white. It will be tricky, I looked at a LOT of places before finding this one. You will need one that is 36+ inches with loose curls and preferably a part in the middle.
-Optional, White cap: My hair is really dark, so you could still she a dark base with the wig. I just got a little white cap from Wal-Mart for $1.50 and wore it underneath. It also helped the wig not itch my head so much.
Makeup for the White Queen Costume
– White foundation make up: DO NOT GET HALLOWEEN MAKE UP! I tried this first and my face was flaky and disgusting within 4 hours.
– For my second trial I just got the whitest real make up foundation and a white powder. I used L’Oreal Visible Lift Liquid Foundation in 102 Soft Ivory and then Revlon’s Photo Ready Translucent Finisher in 001 Translucent. I don’t think it is really supposed to make you whiter, but if you apply it with a sponge rather than the included blush brush, you will get the needed result. Also, I also used a redness reducing base before (since I have a naturally redder complexion). You will want to put the make up on your face and neck (and back or your neck/shoulders) down to the dress line. Then on my arms I mixed the foundation with a regular body lotion for easier application. (Also, though I am pretty white normally, so you may need to do full make up still on your arms and hands).
-A dark brow liner: A liner may look too thick and unnatural, so you might wanna try a dark dark brown powder and brush it on your real eyebrows instead. This is what I did and then just filled in a little more than normal.
-A dark burgundy lipstick and liner: In the movie her lips are purple sometimes and red other times. In pictures it is a dark red and that is what I went with, although I tried purple too. The best purple was Revlon’s Super Lustrous Lipstick in 663 Va Va Violet. The burgundy I used and liked the most was L’Oreal’s Infallible Lip Colour in 790 Kate’s Plum. This one was good too because it is a stain and then has a gloss included. It lasted all night, whereas the purple needed to be reapplied every hour or so.
-A pearl choker. I started making one from leftover lace from the dress, but it scratched my neck and was uncomfortable so… some kind of choker is necessary though.
-Black nail polish: on a short nail.
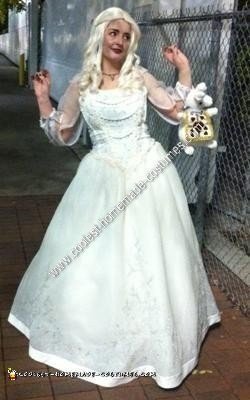
-Optional, Rabbit purse. I found a White Rabbit purse at a costume store. It was a cute addition and held my necessities while I was out.
Making the White Queen Costume
You’ve probably figured out most of the directions for the White Queen costume just from the supplies you will need.
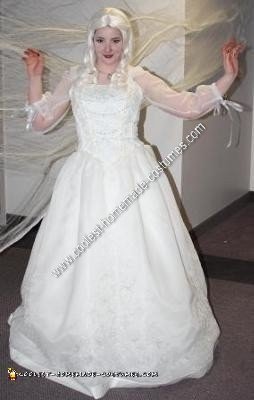
I started with a wedding dress and then added lace and beads to look like the dress from the movie. You need to add lace in the same of a “V” down the front the a renaissance style. Make the point of the V go a little lower than the nature waist line of the dress. and spread it wide. Then string the beads you would like and run the beads across the front in parallel horizontal lines. Measure first. Then probably leave one side untied, try on the dress and then pull it to where it needs to be to be even with the other beads. (I tried to just measure it, and then when I got it on, the beads across the bust were tighter than all the rest.)
I also added lace around the waist off the dress. Then, I took the sleeves off and made organza sleeves like in the movie. I am not a professional seamstress by any means. This is what took the longest. So, f you can find a work around I would suggest pursuing some other options. I created a pocket like seam at the bottom to run a ribbon through and bunch up and tie.
That was most of what I did on the dress. I talked about the make up in the supplies above. Then, I had to style the wig that was all ready parted in the middle. I pulled back the front and secured it with bobby pins with a decorative flower.
And that’s about it. I loved my White Queen costume. When it was done and had tons of people asking to take pictures with me and such. It was a fun project, but is no small undertaking. If you are up for it though, good luck and have fun!
Thanks to this cool site for featuring all the cool homemade costumes. Especially thanks for all the many awesome homemade Alice in Wonderland costumes!
Great work! I am doing the same. Loved all your helpful hints. Thanks!!