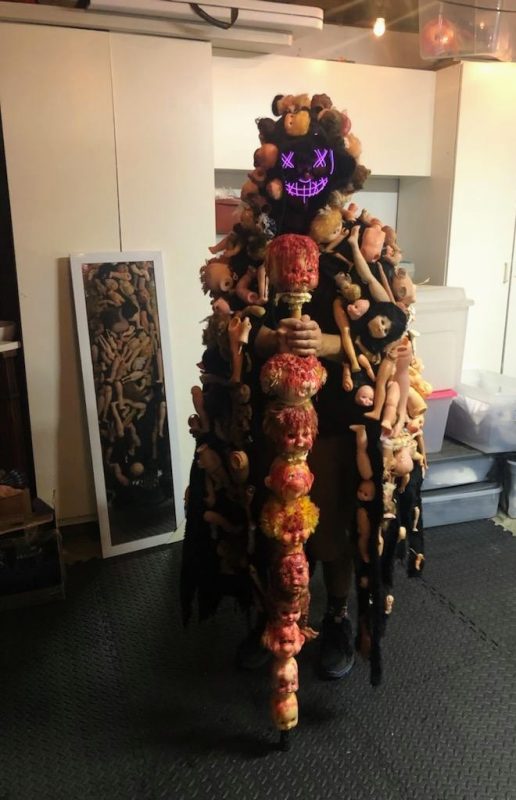
Inception of this scary doll maker costume.
Halloween is my favorite holiday. By a lot. Nothing even comes close. AND, I will never forgive CoVid for stealing Halloween 2021 and perfect storm of Saturday night, full moon, and clock roll-back from me.
No haunted houses. No costume parties. No trick or treaters. I didn’t even try with a costume last year since I was home alone, and it was high CoVid season where I lived. BUT, silver lining, all that means that this year I had two years of Halloween energy to burn and, the world being what it is now, I wanted to do a scary costume for the first time in a decade.
Now, in terms of finding a scary costume, I’ve always loved scenes in haunted houses that have LOTS of one thing arrayed in a creepy way. You know what I mean, right? A room full of rats, or eyeballs, or shrunken heads, or spiders, or whatever. So, I thought to myself, “how creepy would a room full of old dolls be?” Then I thought to myself, “how creepy would a costume covered with old dolls be?”
Then, I thought to myself, “why not both?”
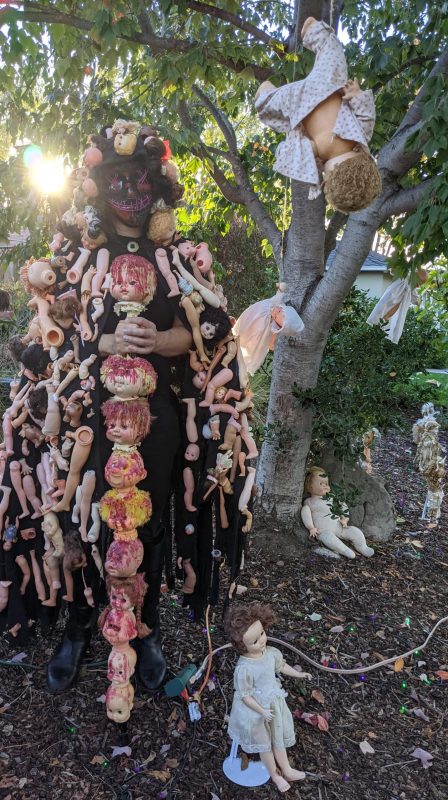
That’s when The Doll Maker costume and his Doll House for Halloween 2021 was born. A costume and front yard covered in dolls.
On to the doll maker costume!
How it was made:
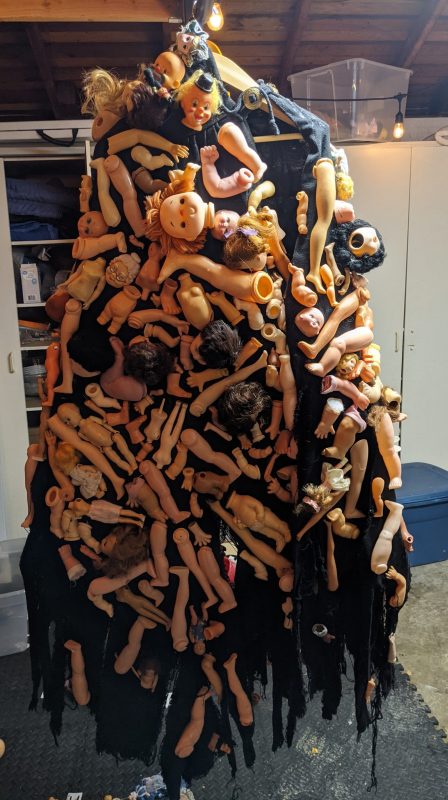
The Dollmaker’s Cloak
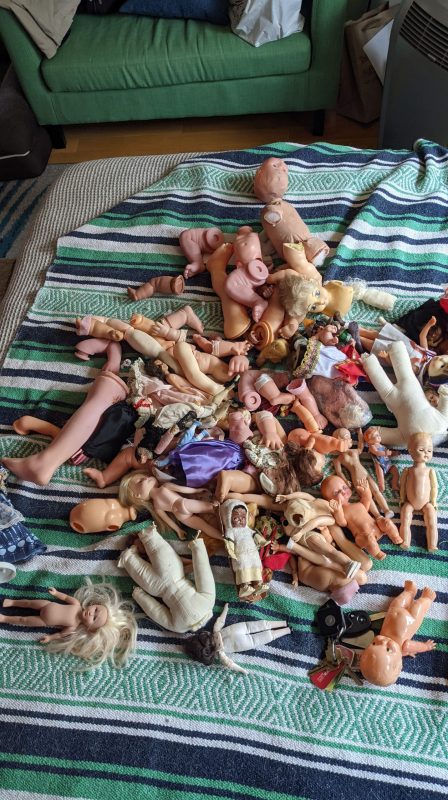
- Bulk by doll parts. I knew going in that this would be both the most expensive and most time-consuming part of this project. I started search for doll parts on Etsy, Craigslist, and eBay in early September. Gradually accumulating “lots” of doll parts from vendors and having them shipped to my house. By Mid-October there were five grocery bags filled to the brim with random heads, legs, arms, hands, feet, and torsos in my bedroom. At that point there was a slight aroma of old rubber and plastic permeating my house.
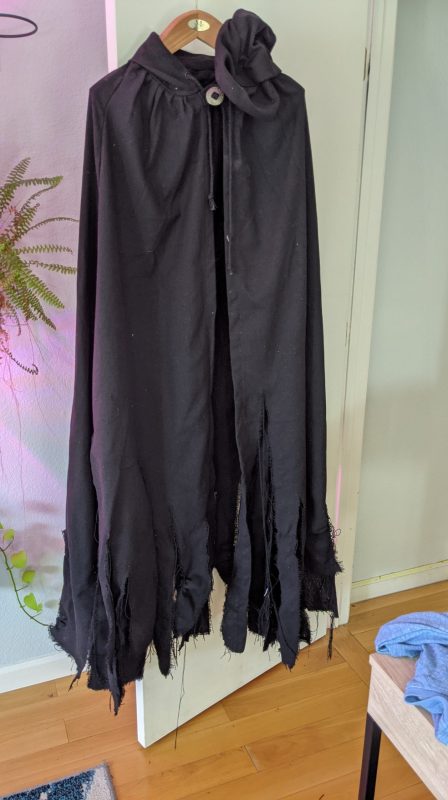
- Find the garment. I spent some time considering between a cloak (no sleeves) and a robe (sleeves). In making this determination I was thinking which choice would have less “part loss.” That is, which garment would knock lose more doll parts during general movement. With the cloak I thought I would see more part loss around part in the middle, and with the robe I thought I would see more part loss under the sleeves. In the end, I went with the cloak.
- Weather the cloak. Ripped slits up from the bottom him of the cloak to anywhere between calf and knee, and randomly cut the resulting strips to random lengths. After that, I dragged this cloak behind me while walking my dog for THREE WEEKS. Totally worth it.
- Affix doll parts to cloak. Debated for a long time between hot glue, epoxy, and sewing everything on. Hot glue would be the fastest and weakest, sewing the slowest and strongest, and epoxy somewhere in between. In the end I went with epoxy.
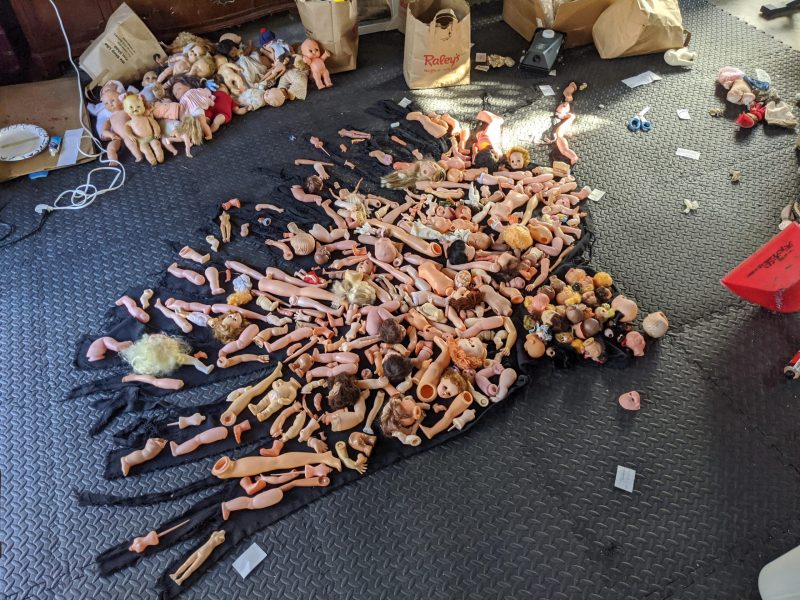
I laid the cloak out on my garage floor and arrayed the doll parts in a densest at the top and sparsest at the bottom pattern, trying to further the tattered ethos of the cloak. Then I mixed up the epoxy on a paper plate, dipped the side of the doll part in the epoxy and then pressed it to the cloak.
This part took a LOT of epoxy and a LONG time. The entire Underworld series of movies, in fact. I can’t imagine how long sewing all those parts on would have taken. Also, older me is very proud of younger me’s absolute crush on Kate Beckinsale.
e. First hang. Moment of truth time. Time to hang this sucker up and pray that everything doesn’t fall off. So, I grabbed it from the underside, put it on a cedar hanger and started to lift it up and pray.
Had a little surprise right here first plastic hangar snapped due to the weight. I knew this cloak was going to be heavy, but I didn’t realize how heavy. It clocked in at a whopping 33 lbs. Anyway, swapped to a cedar hangar and got it hung. I was surprised that only a few pieces fell off which were pretty easy to put back on. I wanted to “time test” it and let it sit for a few days seeing if things would fall off. Not much did. Yay!
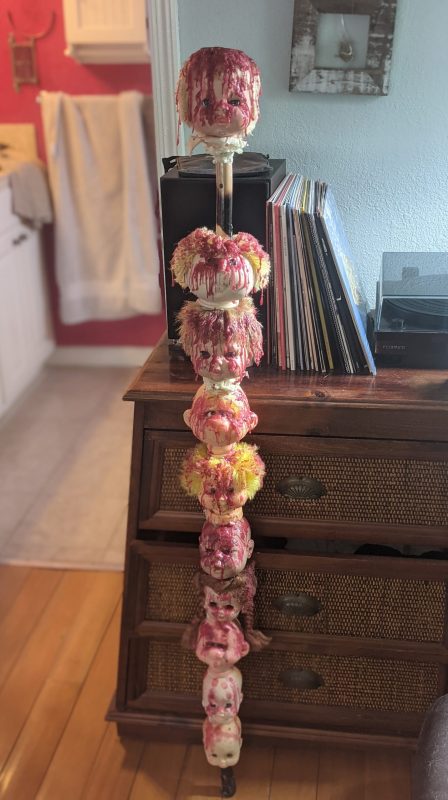
The Bloody Staff
- Buy (or find) a walking staff). I went the buy route because I didn’t want a random stick snapping when I made them.
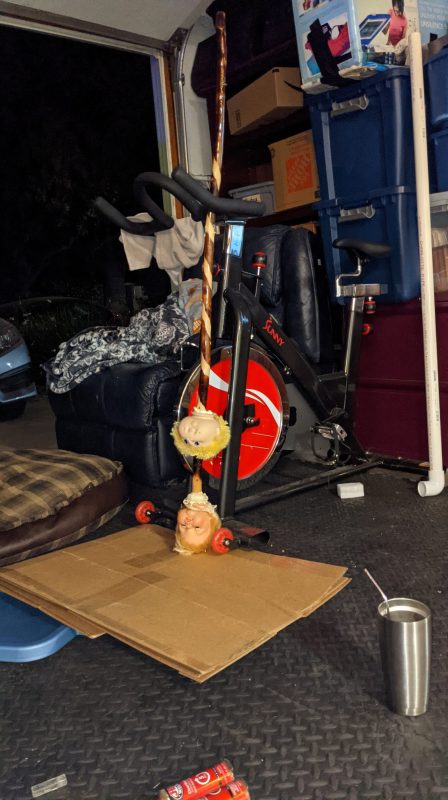
- Separate doll heads. I picked out the largest doll heads from the parts I ordered above. Large enough to have the staff run through the middle from crown to neck.
- Cut holes in the doll heads. I laid out the doll heads in the order they would go on the staff (biggest on the top), then cut holes in the top and slide them onto the shaft of the staff. This part was really just about making sure everything fit correctly.
- Affix doll heads to staff. Starting with the top head, slide it onto the staff and fill the space with expanding foam. Let the foam cure for a few minutes. Repeat down the staff for each head. Leave a space where you want your hand to grab the staff.
- Candle waxing the staff. I ran four or five red candles and when there was enough hot wax I would slowly drip them onto the heads. Pouring too fast doesn’t get a good effect so be patient. I also didn’t go solely from the top head because the drip patterns didn’t work out. That is, sometimes I would pour wax onto middle heads (rather than top) to let it drip down.
The mask
Just a simple purge mask off of amazon. Went with purple since it matched my yard lights.
Reactions we got form the doll maker costume:
I wore this costume on two occasions: Halloween Eve for my annual house party and Halloween for Trick-or-Treaters.
During trick-or-treat I stood in my lawn triggering the fog machine which was an eerie look. Most people thought that I was a prop until I yelled, “Hallowed are the dolls!” I also walked the neighborhood for a while and people linked me with my decorations, which was amazing. “Are you the Doll House guy? That place is great!” *insert TWO devil emojis*
During trick-or-treat I stood in my lawn triggering the fog machine which was an eerie look. Most people thought that I was a prop until I yelled, “Hallowed are the dolls!”
All around, Halloween 2021 was an 11/10, would recommend.
PS. Thanks to my neighbor for doing the semi-professional photoshoot of the house.






Your comment has been sent successfully.