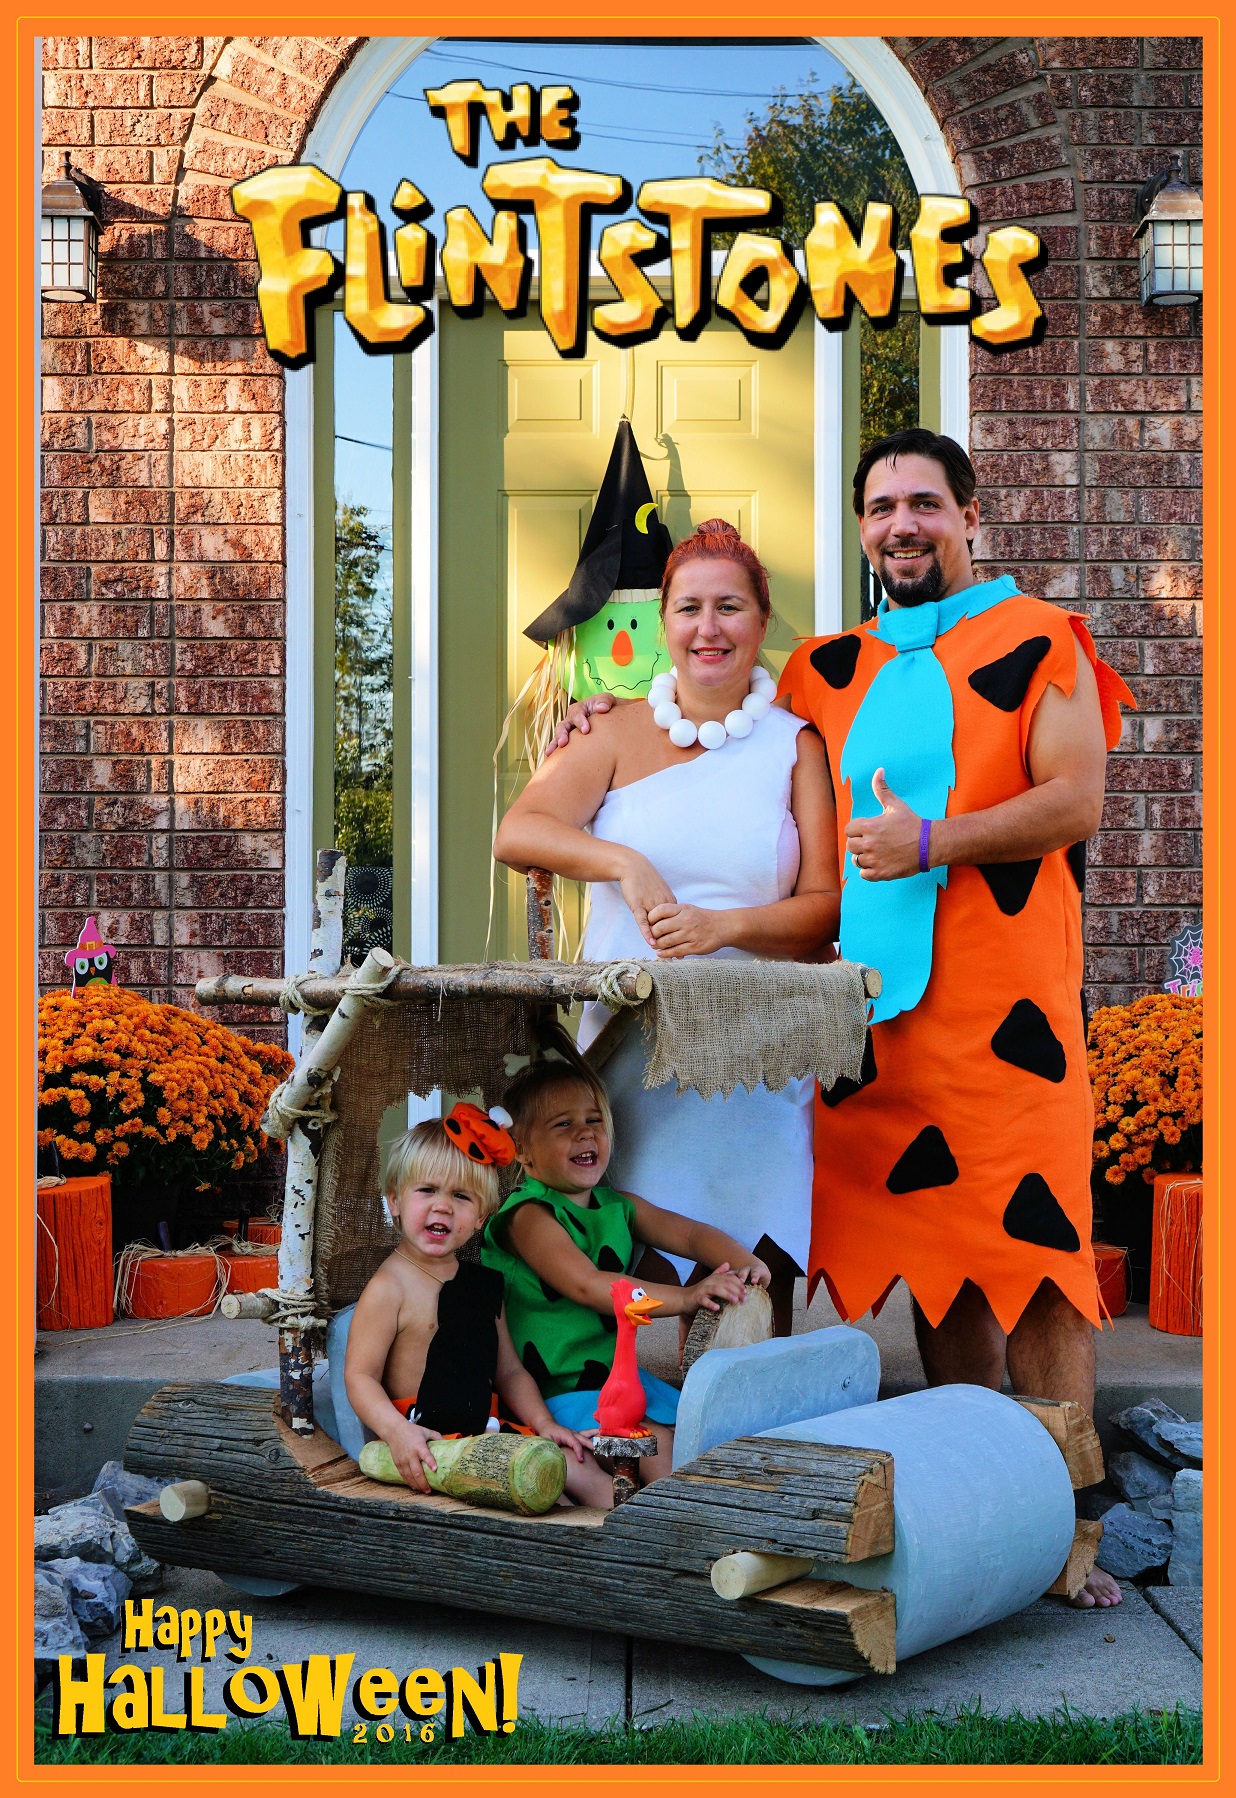
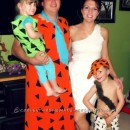
What great fun we had with our Flintstones family Halloween costume. Having kids seems to have rejuvenated my inner-child and rather than buy our Halloween costumes, I’ve gotten the bug to create them the last few years, and hopefully provide the kids with lasting memories along the way.
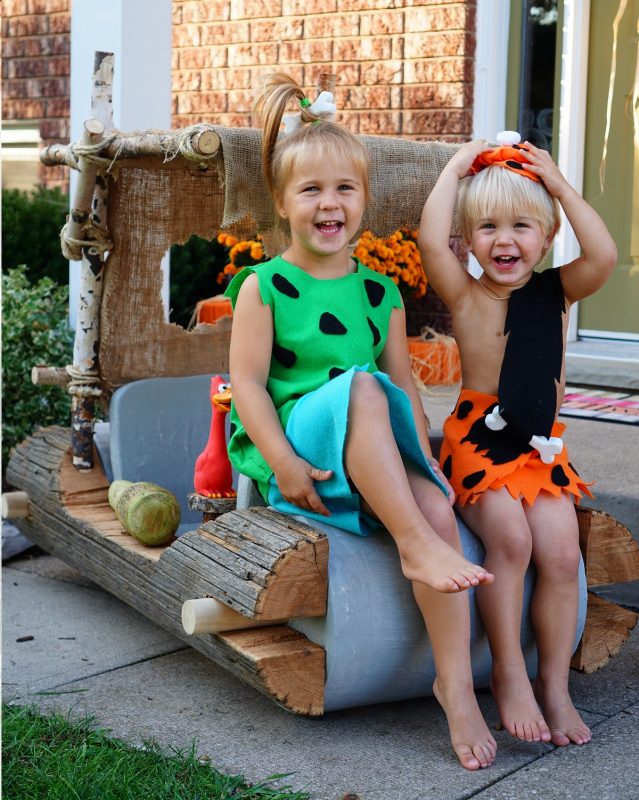
A couple of years ago we did our “Sidey’s Pest Control” Mouse Trap costume, followed by our “Chips + Buds Spud Wagon” Fry Truck last year. I wanted to take advantage of a group costume idea again (while they still let us!) and for this year, I settled on a Flintstones family Halloween costume; my wife and I would be Wilma & Fred, while the kids would be Pebbles & Bamm Bamm. Part of the deciding factor was that I like building a main prop to go along with the costumes, and I loved the idea of a kid-sized Flintstones car!
Although the costumes were pretty straight forward, it was a little time consuming since I have no sewing experience and it was all done by hand:
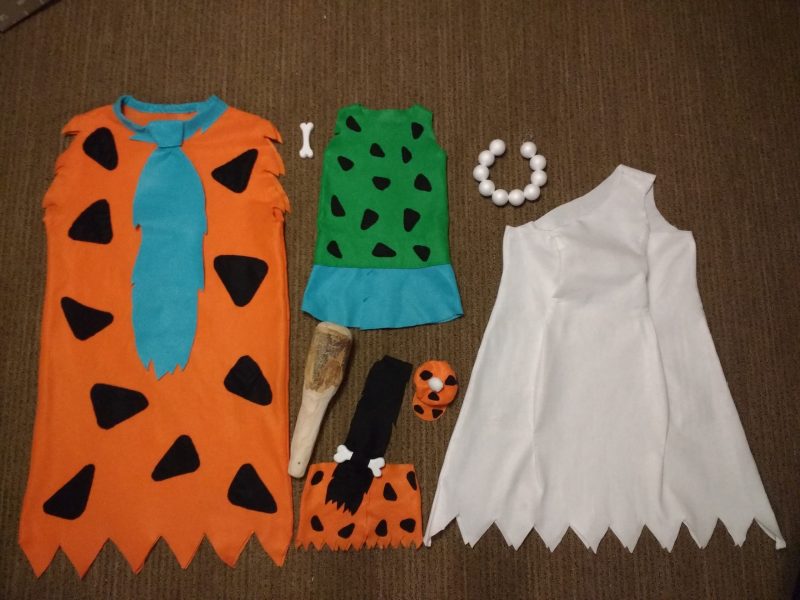
All the costumes are made from felt and the main shape was taken from tracing around a loose fitting shirt with some extra room to spare (since felt doesn’t have any give to it).
Fred – 2 yards of felt was sewn up the sides, then it took some trial and error on the sleeve length and shaping of the shoulders so they didn’t stick up. The sleeves and bottom were given a jagged cut to finish off the main shape. The tie is one piece with the “knot” being several layers of felt folded over and sewn together. The collar was made from a scrap piece from the tie and sewn around the neck opening, which actually made the neck stand up as a nice added touch. Lastly, several patches were cut from black felt and individually sewn in place both front and back.
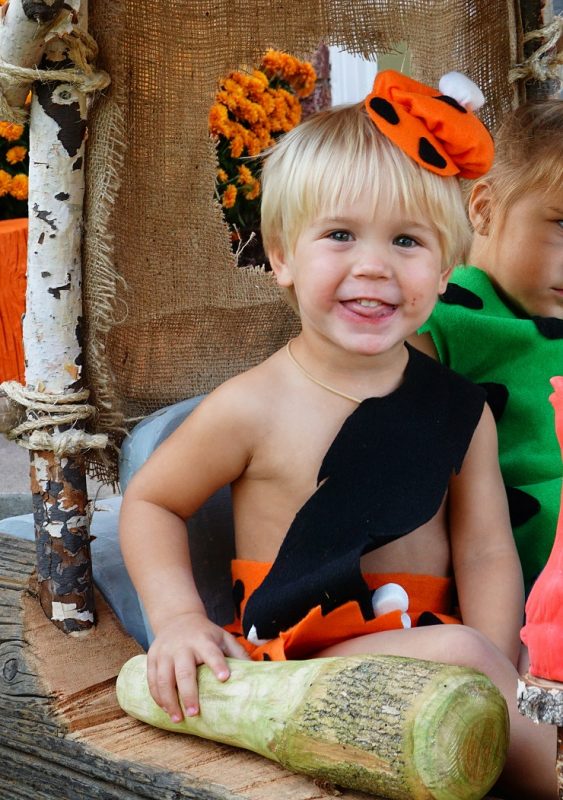
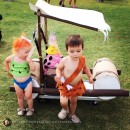
Bamm Bamm – I wrapped some felt left over from Fred’s costume around my son and tapered the top to give it a bit of a flare. I then added a black shoulder strap and sewed in a bone made from ¾” plywood. His hat was made from a round piece of felt that I threaded a line around the perimeter and then pulled tight to bunch it up – I then added a brim, stuffed it with scraps and sewed a bottom piece on to hold it all together (the white ball on the top was also made from a round piece of felt as we didn’t have any cotton balls). Again black patches were sewn on and jagged edges cut into the skirt and strap. Bamm Bamm’s bat was shaped from a tree branch with an axe and belt sander, then rubbed with fresh grass to give it the green tinge (it was only used for the pictures as it was heavy and bound to cause some trouble!)
Pebbles – I made the shirt first and wasn’t sure how I wanted to do the bottom. Since my daughter is a toddler, I decided to make a skirt rather than the diaper worn by Pebbles – I sewed the two pieces together which made it easy to slip the whole outfit over her head. The bone in her hair is made from ¾” plywood and held in place with hair ties. Again black patches were sewn on her shirt both front and back.
Wilma – The necklace is made from Styrofoam balls with thread sewn through them. The dress was initially made the same was as Fred by sewing up the sides, then one sleeve was cut off and the outfit was pinched/pinned where needed both front and back and finally sewn to give a better dress-like fit. I’m no seamstress, but it’ll have to do! Lastly the bottom was given a jagged cut. We sprayed her hair with temporary orange colouring and she didn’t have any red lipstick, so she used a red M&M!
The kids trick or treat bags are regular bags wrapped in burlap to go with the theme. The kids will be wearing white shirts/pants dyed a tan colour under their costumes on Halloween night as it is typically quite cool.
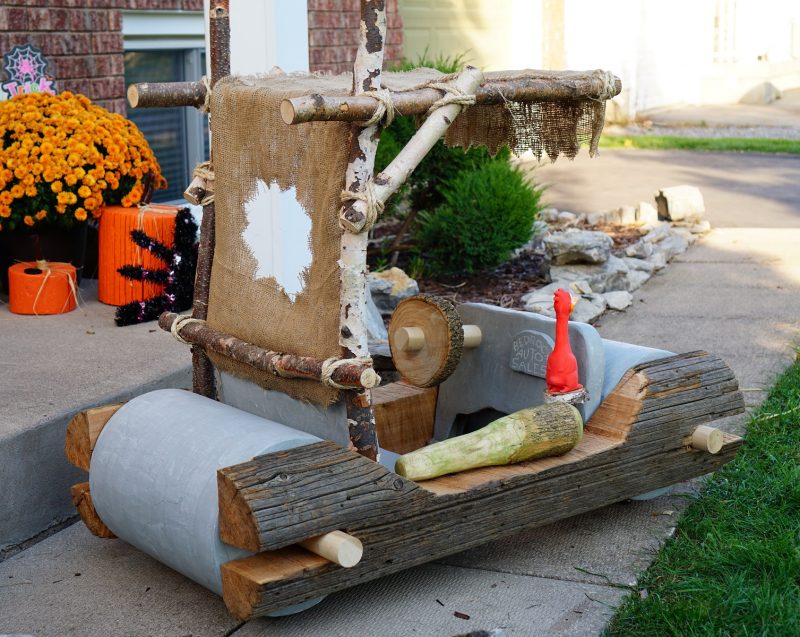
While the Flintstones family Halloween costume idea has been done, including the car, I haven’t seen someone make the car quite this way. I wanted it to look as natural as possible, so just about everything is made out of real wood/branches and all hardware is concealed.
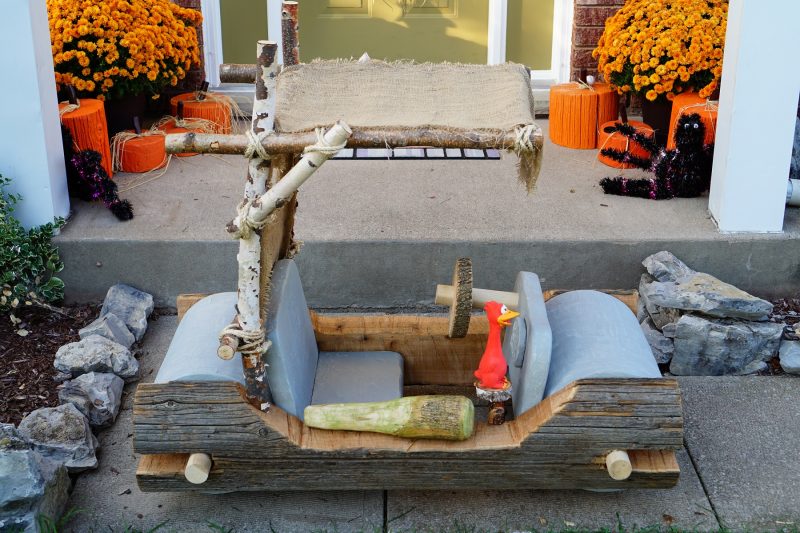
The main body/log was a 60 year old utility pole I had that was shaped first (so it would be symmetrical), then cut in half with a chainsaw – I marked it with a chalk line and strapped it to my deck railing so I could cut it down the centre as even and square as possible.
I laid out the two halves of the log with the axles to figure out the minimum width required with both kids sitting in between – I wanted to keep it as narrow as possible to keep both the size and weight down.
The rollers are sonotubes with ¾” plywood endcaps nailed in place and some 2×2” & 2×4” internal braces added. I originally wanted to have the rollers functional and thought about using bearings to accomplish this, but that was going to get too expensive and I didn’t trust the sonotubes to take the abuse without falling apart. I really didn’t want the casters to be visible, so I installed the bracing 1.5” from the bottom so that they are recessed and only provide one inch of ground clearance. The holes in the sonotubes for the casters were cut with a 4” holesaw for a clean look and allow for full rotation of the front casters.
The axles are solid 2” wood dowels slipped directly through the end caps of the rollers and the log sides.
The seat bottom is ¾” plywood mounted on top of 2×2” braces on each side of the log. The seat back and dash both have a 2×2” frame that is capped on both sides with ¼” plywood to give it some thickness, but also keep the weight down. I shaped the edges of all three pieces roughly with a jigsaw and belt sander to get it an uneven, chiseled-from-rock look. I notched a birch branch on each side and mounted it to the bottom of the dash for a foot rest when the car was being pushed. The original intention was for the kids to be able to pedal with their feet, and while they can do it on a smooth surface, the car is too heavy for them to do it for any length of time.
Once all the “rock” pieces were made up from wood, I slathered them in automotive body filler as sloppy as possible, smoothed them out with a belt sander, then applied primer to get a flat-grey finish. After lightly sanding, it gave the pieces a nice uneven colour and a pretty convincing rock appearance.
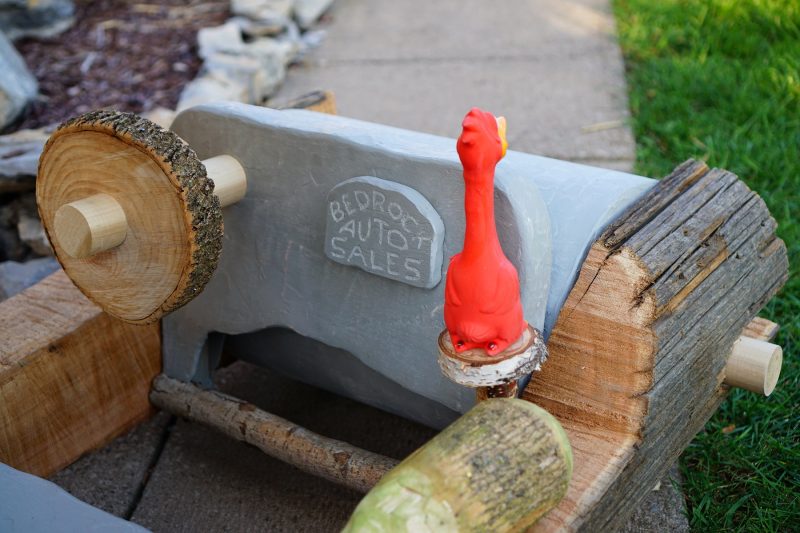
I made the steering wheel shaft out of a scrap piece from one of the 2” axle dowels and a thin piece cut from the trunk of a tree we cut down at my father’s house last year. It goes through the first layer of dash for support and is lightly screwed to the back layer, allowing the wheel to turn like a real steering wheel – the kids love it and have to take turns “driving”.
The roof support was made entirely of birch branches. The upright posts are sunken ~4” deep into the logs on each side and the lower cross brace is screwed into the back of the seat for support/leverage when being pushed by the top of the horizontal supports. The branches are all screwed together, then double wrapped in thick twine (tied and hot glued in place) and finally it was all covered with some old burlap I had laying around.
I wanted to add a couple extra details to the car and settled on a prehistoric bird “horn” for the passenger (eliminates fighting over who drives!) and a dealership badge for the bare spot on the dash. I considered adding a gauge or two, but decided against it.
The main cost for this project comes from the purchase of felt ($80) for the costumes as the only things I needed to buy for the car was some extra birch branches ($10) and a gallon of body filler ($35). I worked on the car for a few weeks after work and picked away at the costumes and accessories over the next week or so.
All in all, the Flintstones family Halloween costume was a fun project and I’m quite happy with how it all turned out – we wore it to a local zoo for an event they had in early October and everybody loved it!
Your comment has been sent successfully.